The first deck I ever built was a disaster. I was 22, fresh out of college, helping my buddy Jason create a “simple” 10×12 platform behind his starter home in Michigan. We had a circular saw, enthusiasm, and absolutely no idea what we were doing. Two weekends and one minor injury later (turns out deck screws driven into your thumb really hurt), we had created what Jason proudly called a deck. In reality, it was more like a wobbly wooden raft that happened to be attached to his house. The boards weren’t spaced properly for drainage, the railings wiggled ominously if you leaned on them, and the whole thing listed slightly to the left like a ship taking on water. It lasted about three years before we tore it down and started over—this time with actual knowledge, better tools, and a building permit.
Looking back, I realize we made the same mistake most people make when approaching deck projects: we focused entirely on the basic structure without considering any of the details that transform a wooden platform into a genuinely functional outdoor living space. Twenty years and dozens of deck projects later, I’ve learned that the difference between a basic deck and one that becomes the favorite “room” in the house often comes down to seemingly small design decisions that have outsized impact.
Last summer, I helped my neighbors Jen and Mark reimagine their existing deck. They had a solid-enough structure—pressure-treated lumber in decent shape, properly permitted and built about ten years earlier. But they rarely used it. “It’s just… boring,” Jen admitted when they invited me over to take a look. “And it always feels too hot or too windy or too something.” She wasn’t wrong. Their deck checked all the basic boxes but missed everything that makes outdoor spaces inviting and functional.
By making strategic changes—without rebuilding the entire structure—we transformed their seldom-used deck into their favorite warm-weather hangout. The best part? Many of the most impactful changes weren’t even particularly expensive or complicated.
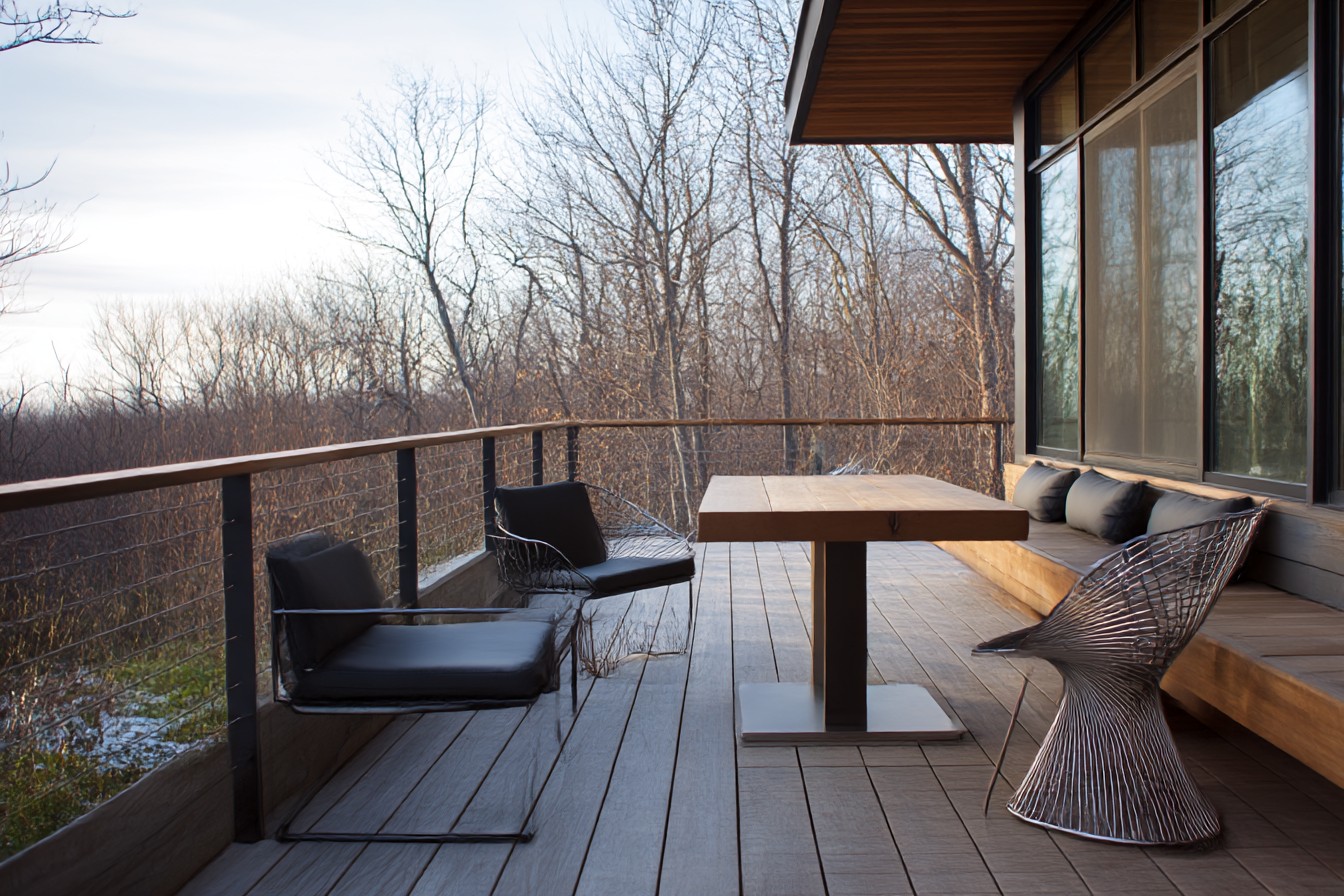
Let’s start with railings, which are the single most visible element of most elevated decks. Jen and Mark’s original deck had standard pressure-treated wood 2×2 balusters—the straight up-and-down pieces between the top and bottom rails. Functional? Yes. Inspired? Hardly. They created this cage-like feel and blocked views when seated.
We replaced them with black aluminum balusters that practically disappear when you’re looking through them, instantly opening up the view to their backyard. This change alone made the deck feel twice as spacious despite not adding a single square foot. The material cost difference was maybe $200 total, but the visual impact was enormous. If you’re building from scratch or replacing railings entirely, glass panels or horizontal cables can achieve a similar effect, though they’re definitely pricier options.
The railing upgrade sparked another realization: most deck designs completely ignore the experience of being on the deck. Sounds obvious, but stay with me. Traditional railings are designed to meet code requirements (typically 36″ high with no gaps larger than 4″), but they rarely consider sightlines when you’re actually seated—which is how most people spend their time on a deck. By dropping a small section of our new railing to 27″ (with a planter box behind it to maintain safety), we created a perfect viewing window from their outdoor dining table to the kids’ play area below.
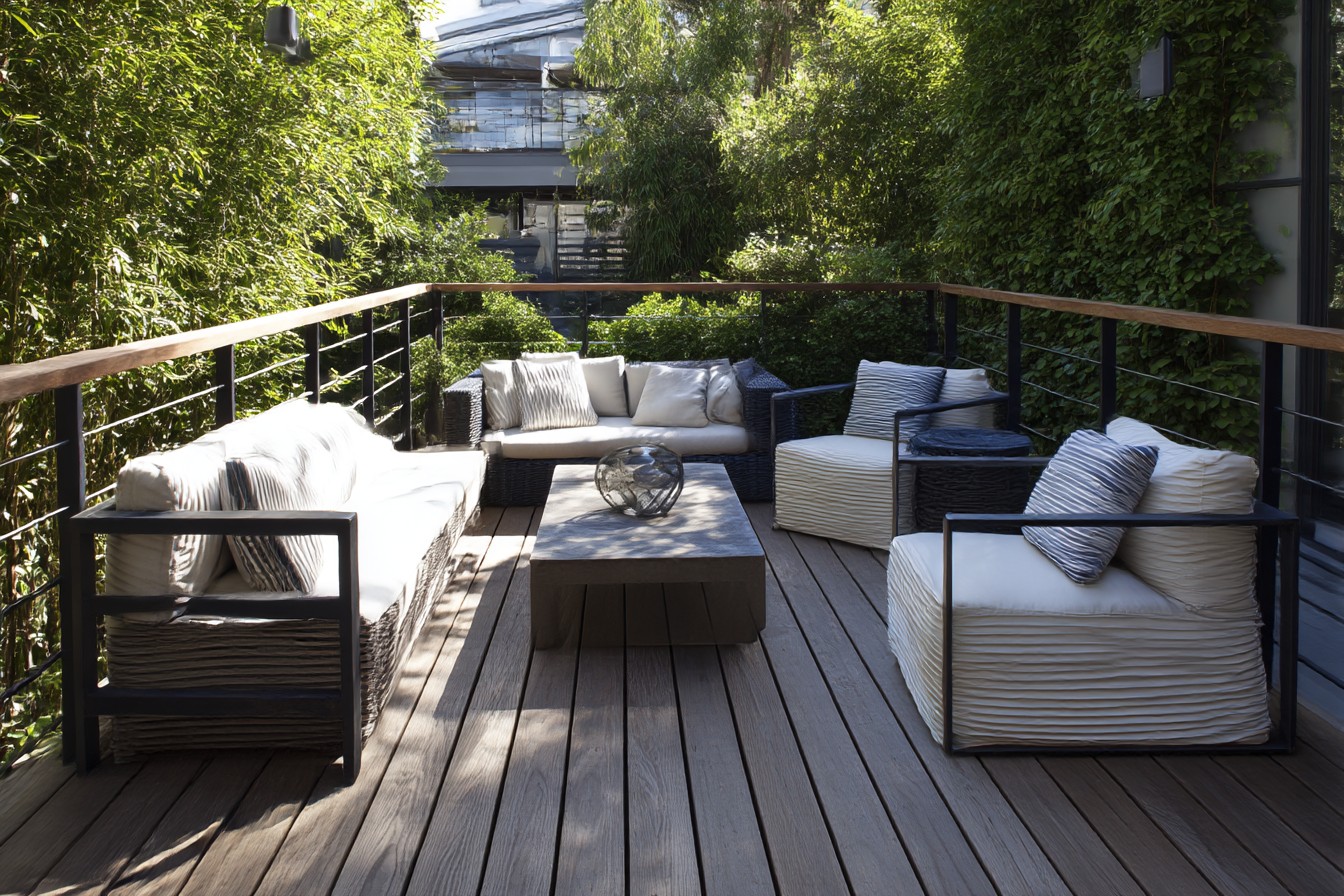
This attention to actual use patterns extended to the furniture layout. Most decks, including Jen and Mark’s original design, are simple rectangles. But human interaction doesn’t happen in rectangles—it happens in conversation circles. We added a 6×8-foot bump-out in one corner specifically sized for their conversation set, which created a natural division between dining and lounging zones without needing walls or other vertical elements. The slight angle of this bump-out also broke up the rigid geometry of the original deck, making the whole space feel more organic and intentional.
Now let’s talk about the exposed underside—the most neglected aspect of elevated decks. Mark and Jen’s deck stood about 5 feet off the ground at its highest point, creating this dark cave underneath that collected leaves, harbored spiders, and was basically wasted space. We installed bamboo reed fence material to the underside of the deck joists for about $80. This simple screen transformed the area beneath from eyesore to asset, creating a shaded spot for their kids’ sandbox and visually “completing” the deck when viewed from the yard. For higher decks, this underside area can become valuable storage space with the addition of weatherproof doors or panels.
One of the biggest complaints about decks is their exposure to elements—too sunny, too windy, too exposed to neighbors’ views. Jen and Mark’s deck sat on the west side of their house, making it an afternoon sun trap that regularly hit 100+ degrees in summer. Rather than building a full roof (which would have required additional permits and significant expense), we created strategic shade with a pergola over the seating area.
But here’s where we deviated from typical pergola designs—instead of evenly spaced slats providing minimal actual shade, we clustered the crossbeams more densely over the seating area while keeping them sparser elsewhere. This targeted approach blocked about 70% of the direct sun where people sit while maintaining openness elsewhere. We also angled the slats to block late afternoon sun specifically, when the deck had been previously unusable due to glare and heat. The pergola cost about $600 in materials and a weekend of work, but completely transformed the usability of the space during peak summer hours.
For wind control, we constructed a partial privacy screen on the north side, where prevailing breezes regularly turned dinner napkins into neighborhood litter. Rather than a solid wall that would block light and views, we created a louvered panel system that blocks wind while allowing visibility through. The bonus? These panels can be adjusted seasonally—opened during hot summer days to allow breezes, closed during cooler evenings when wind protection is desired.
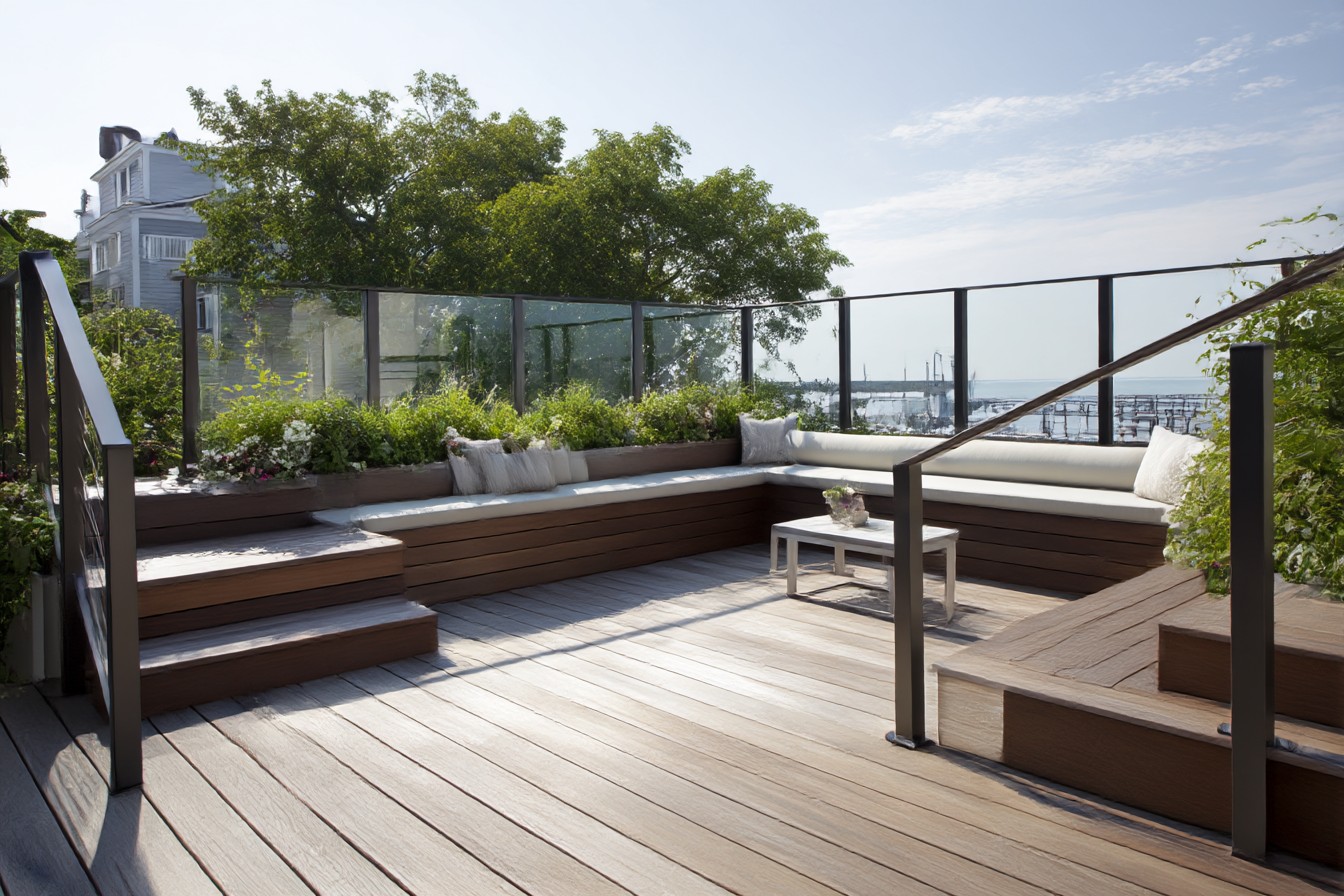
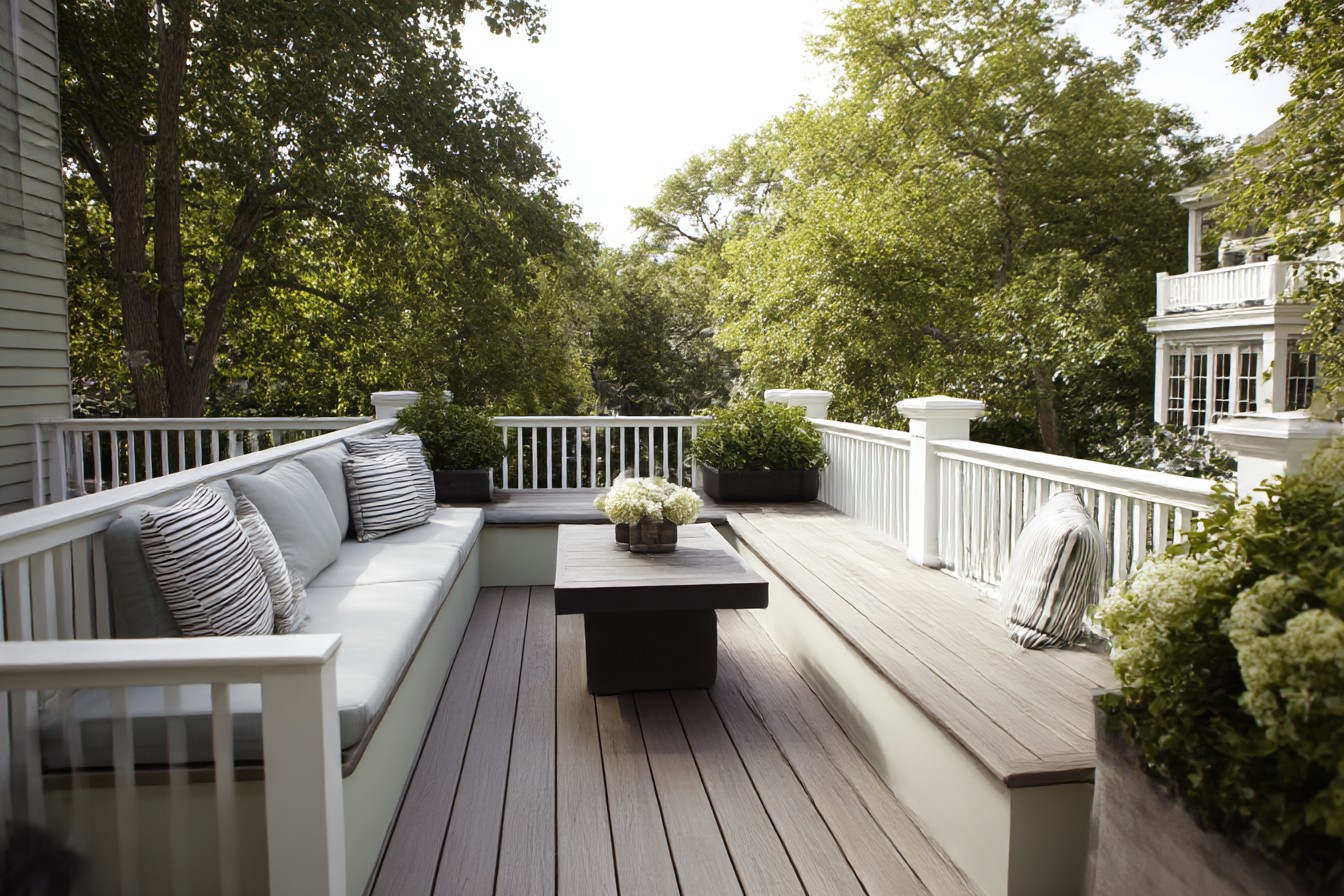
Let’s talk about one of my favorite deck secrets: level changes. Even a modest 12-18 inch change in elevation completely transforms how a deck feels and functions. On Jen and Mark’s rectangular deck, we created a 14-inch step-down for the seating area, visually separating it from the dining space without using railings or walls. This slight level change naturally directs traffic flow and creates distinct “rooms” within the larger deck footprint. If you’re building new, incorporating multiple levels from the start adds minimal material cost but tremendous design value.
Lighting might be the most overlooked yet impactful element of deck design. Your gorgeous outdoor space becomes a black void after sunset without proper illumination. Jen and Mark’s original deck had a single harsh floodlight that gave the ambiance of a prison yard. We replaced it with layered lighting: subtle recessed LEDs in the stair risers for safety, solar caps on posts for boundary definition, and adjustable overhead cafe lights for ambient illumination. The entire lighting package cost less than $300 but extended their useful deck time by several hours each evening.
Most deck builders focus exclusively on the floor, railings, and maybe stairs—overlooking the vertical surfaces that help define the space. By adding cedar lattice panels between selected posts, we created implied walls that provide structure without blocking light or views. These vertical elements give the eye something to register besides open air, making the deck feel more room-like and intentional.
Built-in features deliver continuous value long after construction. In Jen and Mark’s case, we incorporated a serving station with a small sink connected to a garden hose. This simple addition eliminated countless trips in and out of the house during gatherings. The counter height matches their dining table, allowing it to serve as a buffet extension during parties or a potting bench for Jen’s container gardening hobby. Multi-functional built-ins like this maximize utility without consuming excessive space.
Perhaps the most overlooked aspect of deck design is material transitions. When every element uses identical pressure-treated lumber, the result feels flat and institutional. On Jen and Mark’s deck, we introduced controlled material variation—cedar for the privacy screens, black aluminum for railings, composite decking for the step-down seating area. These deliberate transitions create visual interest while highlighting different functional zones.
Most homeowners don’t realize it, but board direction dramatically impacts how a deck feels. The original decking ran in a single direction across the entire surface. By changing the direction in the seating area to run perpendicular to the dining zone, we created a subtle but effective visual boundary between spaces. This technique costs nothing extra during construction but yields significant design impact.
Weather considerations should drive design decisions beyond just shade structures. In Minnesota, we installed discrete drainage channels at key points on Jen and Mark’s deck, eliminating the puddles that previously lingered after rainstorms. In Arizona, similar channels serve to collect precious rainwater for landscape irrigation. In humid regions, slightly increasing the standard 1/8″ gap between deck boards to 3/16″ improves airflow and reduces moisture-related issues.
Furniture placement isn’t an afterthought—it should dictate layout from the beginning. We designed specific zones around how Jen and Mark actually lived: a dining area sized exactly for their table plus chair movement space, a conversation area that accommodates their existing furniture, and a transitional space that serves as a landing zone when coming through the door. This purpose-driven approach eliminates awkward leftover areas and ensures every square foot serves a function.
There’s an art to creating privacy without building fortress walls. Strategic planting beds attached to the deck perimeter allowed for tall ornamental grasses that provide seasonal screening without permanent visual barriers. These integrated planters also soften the deck’s appearance from the yard and create a gradual transition to the landscape rather than an abrupt edge.
One final detail that makes an outsized difference: continuous board ends versus picture framing. By adding a border board that runs perpendicular to the main decking around the perimeter, we created a finished “picture frame” effect that looks dramatically more polished than decking with exposed cut ends. This technique requires slightly more material and cutting time but elevates the entire project from basic to custom.
Six months after completing Jen and Mark’s deck transformation, I stopped by for a Sunday cookout. What struck me most wasn’t just that they were using the space—it was how they were using it. Different conversations happened in different zones. Kids moved naturally between upper and lower levels. The entire family lingered long after dinner under the cafe lights. The deck had become not just usable but essential to how they experienced their home.
And that’s really the point of all these seemingly small design decisions. A deck shouldn’t just be something you build—it should be somewhere you live. By applying these principles to your own outdoor space, whether you’re building from scratch or enhancing an existing structure, you transform what could be just another wood platform into a genuine extension of your home. No wobbly railings or thumbs impaled with deck screws required.